Garage door sensors are crucial for ensuring the safety and functionality of your garage door system. These small yet essential devices prevent accidents by detecting obstacles in the door’s path and halting its motion. In Alexandria, VA, homeowners rely on their garage door sensors to maintain smooth operations and safeguard their families. Regularly testing your garage door sensor can save you from potential hazards and costly repairs.

Testing your garage door sensors isn’t just a matter of functionality; it’s a safety measure that ensures compliance with local building codes and manufacturer guidelines. Whether you’re a DIY enthusiast or seeking professional guidance, this step-by-step guide will walk you through everything you need to know about garage door sensors. Let’s explore the details and help you keep your new garage door operating seamlessly in Alexandria, VA.
What Are Garage Door Sensors?
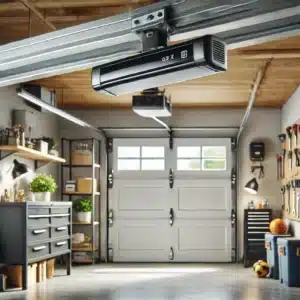
Garage door sensors are safety devices installed on most modern garage doors. Their primary function is to detect any object or person in the door’s path and prevent the door from closing, thereby avoiding accidents or damage. They are not just a convenience but a critical safety measure mandated by most building codes.
Types of Garage Door Sensors
- Photoelectric Sensors: These sensors use infrared light to create an invisible beam. If the beam is interrupted, the sensor stops the door from closing. They are the most commonly used type in residential settings.
- Mechanical Sensors: These sensors rely on physical contact to detect obstacles. When triggered, they halt the door’s movement. While less common, they are still found in some older systems.
- Smart Sensors: Modern smart sensors can connect to your home’s Wi-Fi network, providing notifications and remote access to monitor and control your garage door. These systems often integrate with smart home devices for enhanced functionality.
Understanding the type of sensor installed in your garage door system is the first step in effective maintenance and testing. Knowing the features of your sensor helps you address specific troubleshooting needs more efficiently.
How Garage Door Sensors Work
Garage door sensors use a combination of electrical and mechanical components to ensure safety. The photoelectric sensors, for example, work by sending an invisible infrared beam across the garage door’s opening. If this beam is interrupted, the sensors communicate with the garage door opener to halt or reverse the door’s movement.

This safety feature is designed not only to protect people and objects but also to comply with safety regulations set by organizations like the Consumer Product Safety Commission (CPSC). Modern garage doors in Alexandria, VA, are required to have this functionality to meet safety standards.
Why It’s Important to Test Your Garage Door Sensors
Testing your garage door sensors regularly ensures they are functioning correctly and safely. Faulty sensors can lead to:
- Accidents and Injuries: A malfunctioning sensor may fail to detect objects, causing the door to close on people or items.
- Property Damage: Without a working sensor, your garage door might close on vehicles or other possessions.
- Non-Compliance with Safety Standards: Many jurisdictions, including Alexandria, VA, have regulations mandating functional garage door sensors.
- Increased Wear and Tear: A malfunctioning sensor can cause the door opener to work harder than necessary, leading to premature wear.
By routinely testing your sensors, you can avoid these risks and extend the lifespan of your garage door system. Additionally, routine testing can identify potential issues before they escalate into costly repairs.
Tools and Materials Needed for Testing Garage Door Sensors
Before starting, gather the following tools and materials:
- A clean cloth
- Screwdriver
- Measuring tape
- Level
- A small object (e.g., a box or toy)
- A flashlight (for inspecting wiring)
- Owner’s manual for your garage door opener
Having these tools ready ensures a smooth and efficient testing process. Ensuring proper preparation also reduces the risk of damaging your sensors during testing.
Step-by-Step Guide to Testing Garage Door Sensors
Step 1: Inspect the Sensors
Begin by examining the sensors carefully. This foundational step helps identify any visible issues and prevents potential problems caused by environmental factors or physical damage.
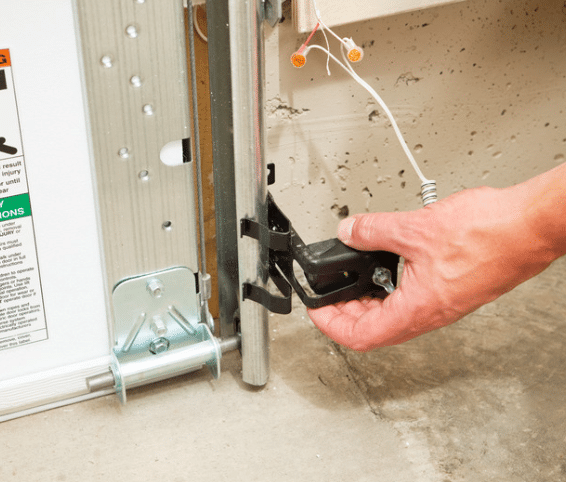
- Check Positioning:
- Ensure the sensors are securely mounted on both sides of the new garage door, approximately 4-6 inches above the ground. Incorrect positioning can lead to malfunction.
- Inspect for Dirt and Debris:
- Over time, dust, cobwebs, and dirt can accumulate on the sensors, obstructing their functionality. Use a clean, soft cloth to gently wipe the sensor lenses. For stubborn grime, use a slightly damp cloth, followed by a dry one.
- Pay special attention to the area around the sensors to ensure there are no obstructions.
- Examine Physical Condition:
- Look for cracks, dents, or other physical damage to the sensor casings. Damaged sensors may require replacement to restore functionality.
- Why This Step Matters:
- Routine inspection not only keeps the sensors operational but also helps prevent long-term issues caused by weather exposure, dirt, or accidental bumps.
Step 2: Check Sensor Alignment

Sensor alignment is critical for ensuring the sensors communicate effectively. Misalignment is one of the most common reasons garage door sensors fail to function properly.
- Look for Indicator Lights:
- Most sensors feature indicator lights. A green light typically signifies proper alignment, while a red light or no light indicates a misalignment or other issue.
- Use a Level for Precision:
- Use a carpenter’s level to ensure the sensors are straight and parallel. Even a slight tilt can disrupt the beam.
- Adjust the Sensors:
- Loosen the screws or mounting brackets securing the sensors. Reposition them until they are correctly aligned. Retighten the screws carefully, ensuring not to overtighten, which could damage the mounting brackets or casing.
- Confirm Alignment:
- Once aligned, double-check the indicator lights to confirm the sensors are functioning properly.
Pro Tip: Realigning sensors is often a quick fix that can resolve many operational issues in minutes.
Step 3: Test the Beam
This step helps you confirm whether the sensor beam is working as intended. The sensor beam detects obstructions and stops the garage door from closing.
- Block the Sensor Beam:
- Place a small object, such as a cardboard box or a broom handle, in the direct path of the sensors. Ensure the object is positioned where the sensor beam passes.
- Attempt to Close the Garage Door:
- Press the garage door remote or wall button to close the door. If the sensors are functioning correctly, the door should stop and reverse its movement.
- Analyze the Results:
- If the door continues to close without stopping, the sensors may need further troubleshooting or repair.
- Why This Test Is Important:
- The beam test ensures the safety feature of the sensors is operational, preventing accidents and potential damage.
Step 4: Check the Wiring

Faulty or damaged wiring can disrupt the power supply and communication between the sensors and the garage door opener.
- Inspect for Visible Damage:
- Examine the wiring for signs of wear, fraying, or breaks. Harsh weather conditions, rodents, or accidental impacts can damage wires.
- Check Connections:
- Ensure the wires are securely connected to the garage door opener terminals. Loose connections can result in inconsistent performance.
- Use Proper Lighting:
- If the garage is dimly lit, use a flashlight to thoroughly inspect the wiring and connections.
- When to Call a Professional:
- If you detect significant damage or are unsure how to proceed, consult a professional electrician or garage door technician to avoid electrical hazards.
Step 5: Test the Safety Reverse Mechanism
The safety reverse mechanism is a critical feature designed to prevent accidents and injuries. This step verifies its functionality.
- Place an Object Under the Door:
- Use a sturdy object, such as a wooden block or a thick piece of foam, and place it directly beneath the garage door.
- Close the Door:
- Activate the door using the remote or wall control. The door should stop and reverse its direction upon making contact with the object.
- Identify Problems:
- If the door does not reverse, it could indicate an issue with the sensors or the mechanism itself. Seek professional assistance if needed.
- Importance of Regular Testing:
- Frequent testing ensures that your garage door remains safe for everyday use, especially in households with children or pets.
Step 6: Consult the Owner’s Manual
Every garage door system is different, so your owner’s manual is an invaluable resource.
- Locate System-Specific Instructions:
- The manual typically includes detailed diagrams, troubleshooting tips, and maintenance guidelines tailored to your specific model.
- Follow Manufacturer Recommendations:
- Adhere to any special instructions provided for testing, cleaning, or repairing the sensors.
- When in Doubt:
- Contact the manufacturer’s customer support team for additional assistance.
Common Issues and Troubleshooting Tips
Misaligned Sensors
- Symptom: Indicator lights are off or blinking.
- Solution: Realign the sensors and ensure they are securely mounted. Use a level for precision.
Dirty Sensors
- Symptom: The door doesn’t close properly.
- Solution: Clean the sensors with a soft cloth. For stubborn dirt, use a damp cloth followed by a dry one.
Damaged Wiring
- Symptom: No power or inconsistent performance.
- Solution: Check the wiring connections and replace damaged wires. Use protective gloves while handling electrical components.
Sensor Obstructions
- Symptom: The door won’t close even when nothing is visibly blocking the sensors.
- Solution: Remove any debris or adjust the sensor’s position to clear the beam path. Check for spider webs or small objects that may be hard to see.
Weather-Related Issues
- Symptom: Sensors malfunction during extreme cold or heat.
- Solution: Ensure the sensors are weather-resistant and shield them from direct exposure to harsh conditions. Consider adding covers if necessary.
Additional Tips for Maintaining Garage Door Sensors
- Schedule regular maintenance checks every six months.
- Keep the garage door area clean and free of clutter to prevent accidental sensor blockage.
- Test the sensors after any significant impact to the garage door, such as a vehicle bumping into it.
- Consider upgrading to smart sensors for enhanced safety and convenience.
FAQs About Garage Door Sensors
What is a garage door sensor?
A garage door sensor is a safety device that prevents the garage door from closing when it detects an obstacle in its path. It ensures safety and compliance with modern building standards.
How often should I test my garage door sensors?
It’s recommended to test your garage door sensors every 3-6 months to ensure proper functionality and safety compliance.
What are the signs of a malfunctioning garage door sensor?
Common signs include blinking indicator lights, the door not closing, or the safety reverse mechanism failing to activate.
Can I repair garage door sensors myself?
Minor issues like cleaning or realignment can be done DIY. However, wiring or component replacements should be handled by professionals to avoid risks.
How much does it cost to replace a garage door sensor in Alexandria, VA?
The cost can vary depending on the brand and model, but professional services typically charge between $75-$200 for replacement. Additional costs may apply for advanced systems.
Conclusion
Regularly testing your garage door sensors is essential for maintaining safety and ensuring your garage door operates smoothly. You can identify and resolve common issues by following the steps outlined above. For complex problems or professional assistance, it’s always best to consult experts.
Family Prestige Garage Doors specializes in garage door sensor repairs, replacements, and overall maintenance in Alexandria, VA. Our team is dedicated to providing reliable and affordable solutions tailored to your needs. Whether it’s a minor adjustment or a full sensor replacement, we’re here to help.
End Note
Family Prestige Garage Doors Alexandria, VA is built on a foundation of unwavering family values and a steadfast commitment to providing the best garage door repair in Alexandria and beyond. We take pride in our exceptional customer service and top-notch workmanship, ensuring every project exceeds expectations.
Explore our About Us page to learn more about our mission and values. Need immediate assistance? Visit our Garage Door Repair Alexandria, VA page for expert services. Check out our Service Areas and Gallery for insights into our work. For financing options, see our Hearth Financing Page. Stay informed with tips and updates on our Blog, or Contact Us for any inquiries. Let us help you ensure your garage door operates safely and efficiently.

