 Skip to content
 When your LiftMaster garage door opener remote suddenly stops working, it’s more than just an inconvenience—it can disrupt your daily routine and even compromise your home’s security. Often, the problem is as simple as a dead battery. Replacing the battery in your LiftMaster garage door opener remote is a quick and easy task you can do yourself, helping you avoid the hassle and cost of a service call.
For those who manage multiple garage doors, learning how to program multiple garage door openers LiftMaster can be equally important. In addition to guiding you through the battery replacement process, this comprehensive guide will also offer tips on programming multiple garage door openers, ensuring that all your LiftMaster systems work seamlessly together. With these easy-to-follow steps, you’ll have your remote up and running in no time, maintaining both convenience and security in your daily life.
Why You Need to Replace the LiftMaster Garage Door Opener Remote Battery
The remote control for your LiftMaster garage door opener is essential for easy access to your garage. However, like any battery-powered device, the remote control’s battery will eventually run out of power. Replacing the LiftMaster garage door opener remote battery is a necessary maintenance task to keep your remote functioning properly.
Signs That Your LiftMaster Garage Door Opener Remote Battery Needs Replacing
Before proceeding with the steps to replace the battery, it’s important to recognize the signs that your LiftMaster garage door opener remote battery is dying or already dead.
Common Indicators of a Low or Dead Battery
- Unresponsive Remote: If pressing the buttons on your remote doesn’t trigger any response from your garage door opener, the battery might be dead.
- Weak Signal: If you notice that you need to be closer to the garage door for the remote to work, or if the signal is inconsistent, it’s a sign that the battery is losing power.
- LED Light Dimming: Some LiftMaster remotes have an LED light that activates when you press a button. If this light is dimmer than usual or doesn’t light up at all, the battery may be low or dead.
How to Replace the LiftMaster Garage Door Opener Remote Battery
Replacing the battery in your LiftMaster garage door opener remote is a simple process that requires only a few basic tools. Here’s how to do it.
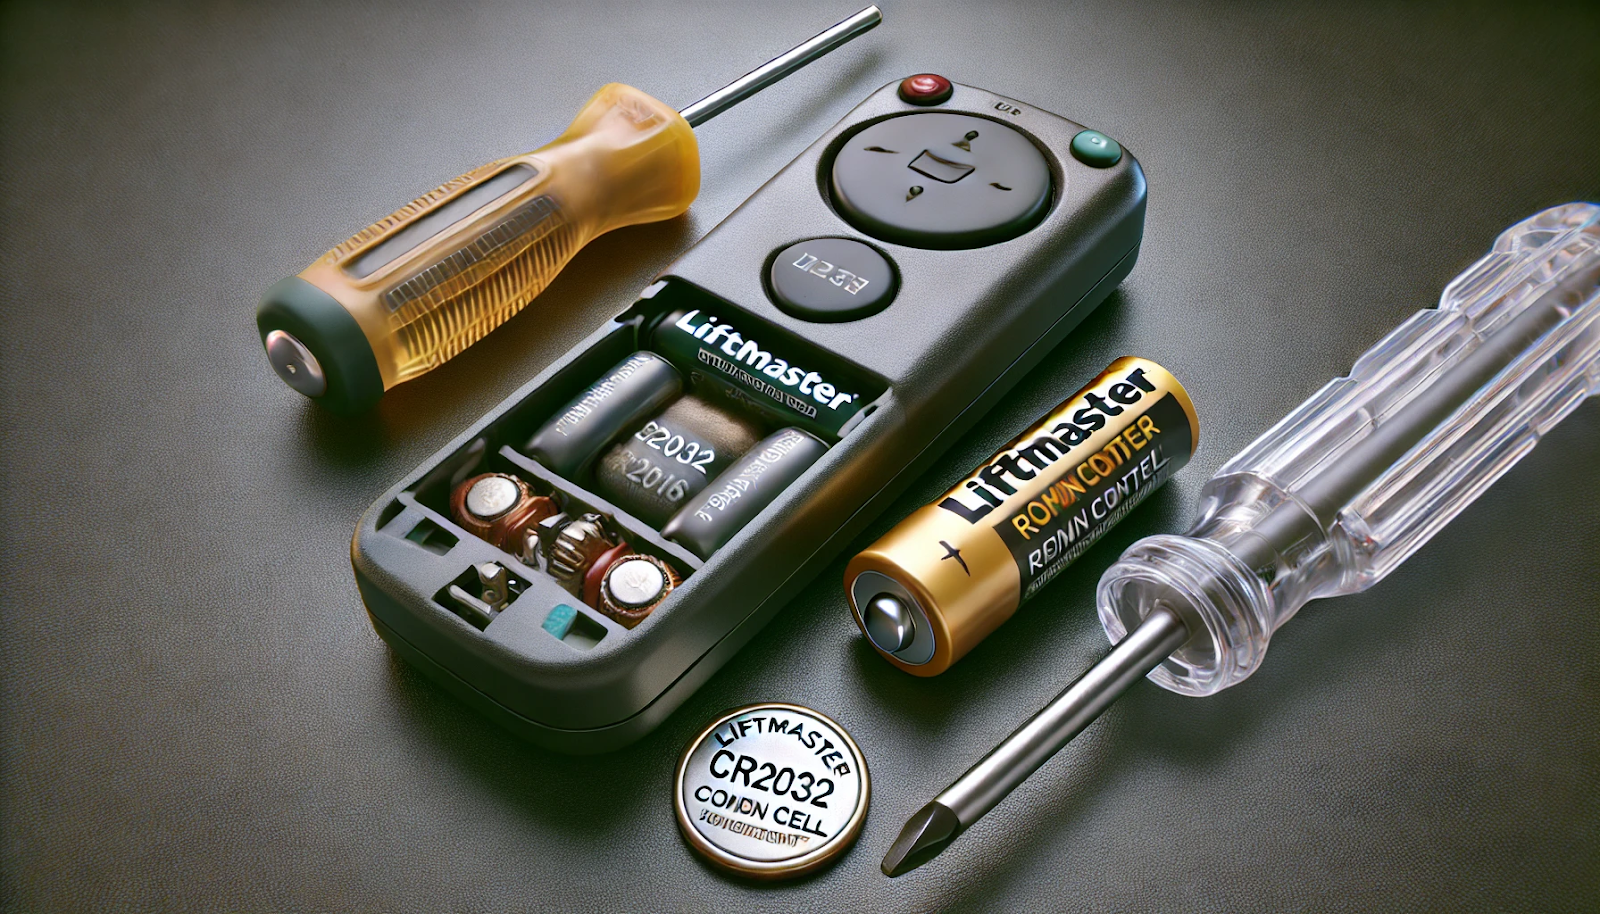
Gathering the Necessary Tools and Materials
Before you begin, make sure you have everything you need to replace the battery in your LiftMaster garage door opener remote.
What You’ll Need
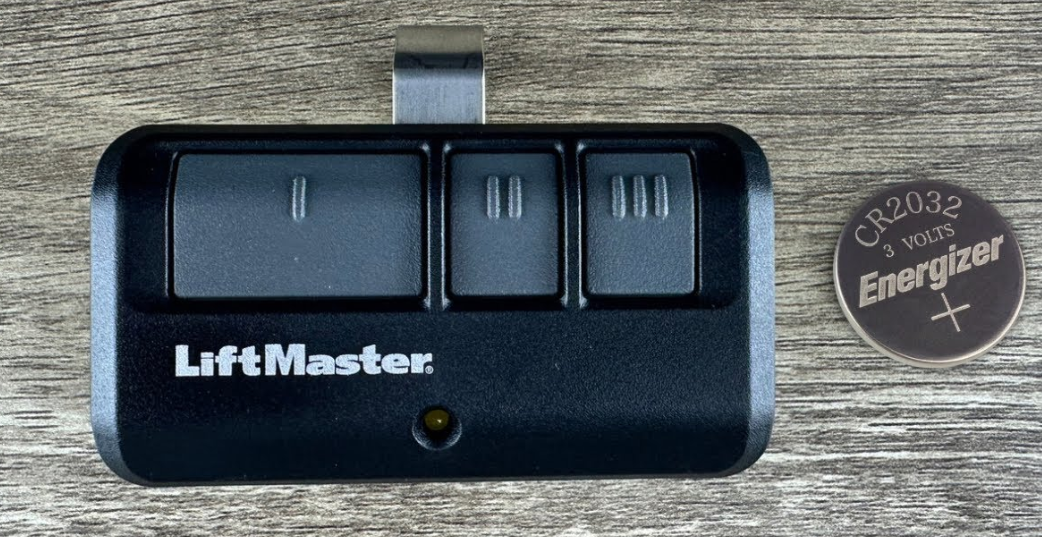
- Replacement Battery: The most common battery types used in LiftMaster remotes are the CR2032 and CR2016 coin cell batteries. Check your remote or the user manual to determine the correct battery type.
- Small Screwdriver: A small flathead or Phillips screwdriver will be needed to open the battery compartment.
Identifying the Battery Type for Your LiftMaster Remote
Different LiftMaster remote models may require different battery types. Identifying the correct battery type is crucial before attempting to replace it.
Checking Your Remote Model
- Model Number Location: The model number of your LiftMaster remote is usually located on the back of the remote or inside the battery compartment. Use this number to look up the appropriate battery type.
- Common Battery Types: The most common battery types for LiftMaster remotes include CR2032, CR2016, and CR2450. These are standard coin cell batteries that can be found at most electronics or hardware stores.
Steps to Replace the LiftMaster Garage Door Opener Remote Battery
Once you have the correct battery and tools, follow these steps to replace the LiftMaster garage door opener remote battery.
Step 1: Open the Remote
- Locate the Battery Compartment: On most LiftMaster remotes, the battery compartment is located on the back of the remote. You may need to slide off the cover or remove a small screw to access it.
- Use the Screwdriver: If your remote is secured with a screw, use the appropriate screwdriver to remove it. Set the screw aside in a safe place to avoid losing it.
Step 2: Remove the Old Battery
- Carefully Remove the Battery: Once the battery compartment is open, gently pry the old battery out using the edge of the screwdriver or your fingernail. Be careful not to damage the battery contacts.
Step 3: Insert the New Battery
- Insert the Replacement Battery: Place the new battery into the compartment, ensuring that the positive (+) side is facing up, as indicated in the battery compartment.
- Secure the Battery: Make sure the battery is seated correctly and securely in the compartment.
Step 4: Close the Remote
- Replace the Battery Cover: Once the new battery is in place, reattach the battery cover. If your remote has a screw, replace it and tighten it with the screwdriver.
- Test the Remote: After replacing the battery, test the remote by pressing the buttons to see if it operates the garage door as expected. The remote should now work with a strong, consistent signal.
Troubleshooting Tips If the Remote Still Doesn’t Work
If your LiftMaster garage door opener remote doesn’t work after replacing the battery, there could be other issues at play. Here are some troubleshooting tips to help you get your remote back in working order.
Check the Battery Installation
Even a small mistake in battery installation can prevent the remote from working correctly.
Common Installation Errors
- Incorrect Polarity: Ensure the battery is installed with the correct polarity, with the positive (+) side facing the correct direction as indicated in the battery compartment.
- Loose Battery: If the battery isn’t seated securely, it may not make proper contact with the terminals. Open the remote and double-check the battery placement.
Reprogram the Remote
In some cases, replacing the battery can reset the remote, requiring you to reprogram it to the garage door opener.
Steps to Reprogram Your Remote
- Locate the “Learn” Button: On your LiftMaster garage door opener unit, find the “Learn” button, usually located on the back or side of the motor unit.
- Press the “Learn” Button: Press and release the “Learn” button. The indicator light will turn on, signaling that the unit is ready to receive the remote signal.
- Activate the Remote: Within 30 seconds, press and hold the button on your remote that you want to program. The lights on the garage door opener should blink, indicating that the remote has been successfully reprogrammed.
- Test the Remote: Press the programmed button on the remote to ensure it controls the garage door as expected.
Inspect the Remote for Damage
If your remote has been dropped or exposed to water, it could be damaged beyond just a dead battery.
What to Look For
- Physical Damage: Inspect the remote for cracks, broken buttons, or other visible damage. If the remote is damaged, it may need to be replaced entirely.
- Water Damage: If the remote has been exposed to water, it may have internal corrosion. If this is the case, drying out the remote may not be sufficient, and replacement may be necessary.
Consider a New Remote
If all else fails, and your LiftMaster garage door opener remote still doesn’t work after replacing the battery and troubleshooting, it may be time to consider purchasing a new remote.
How to Purchase a New Remote
- Check Compatibility: Ensure that any new remote you purchase is compatible with your LiftMaster garage door opener model.
- Purchase Options: New remotes can be purchased from authorized LiftMaster dealers, hardware stores, or online retailers.
Preventative Maintenance for Your LiftMaster Garage Door Opener Remote
Regular maintenance is a good idea to avoid unexpected issues with your LiftMaster garage door opener remote in the future. This will help extend the life of the remote and ensure consistent performance.
Regular Battery Checks
Checking the battery periodically can prevent you from being caught off guard by a dead remote.
How Often to Check
- Every 6 Months: Check the battery status every six months, especially if you use the remote frequently.
- Before Winter: Cold weather can drain battery power more quickly, so check the battery before the winter season starts.
Keep the Remote Clean and Dry
Protecting your remote from dirt and moisture is essential for its longevity.
Cleaning Tips
- Wipe Down Regularly: Use a soft, dry cloth to wipe down the remote regularly, removing any dust or dirt.
- Avoid Water Exposure: Keep the remote away from water or other liquids. If it does get wet, dry it thoroughly before using it again.
Store the Remote Properly
Proper storage can help protect your remote when it’s not in use.
Storage Tips
- Avoid Extreme Temperatures: Don’t leave the remote in places where it will be exposed to extreme heat or cold, such as in a car during summer or winter.
- Keep It Secure: Store the remote in a secure location where it won’t be accidentally damaged or lost.
When to Call a Professional
While replacing the LiftMaster garage door opener remote battery is a simple task, there are situations where professional help might be needed.
Persistent Remote Issues
If you’ve replaced the battery and tried troubleshooting, but your remote still isn’t working, it may indicate a more complex issue.
Possible Issues Requiring Professional Help
- Faulty Garage Door Opener: The problem might not be with the remote but with the garage door opener itself. A professional can diagnose and repair the issue.
- Electrical Problems: If there’s an issue with the wiring or electrical components in the remote or opener, a technician should handle the repair.
Remote Reprogramming Challenges
If you’re having trouble reprogramming your remote after replacing the battery, a professional can assist with this process.
Professional Programming Services
- Quick and Efficient: A professional can quickly reprogram your remote and ensure it’s correctly synced with your garage door opener.
- Peace of Mind: Professional assistance can give you peace of mind, knowing that the remote and opener are functioning properly.
Frequently Asked Questions
What kind of battery does a LiftMaster remote take?
LiftMaster garage door opener remotes typically use a 3-volt coin cell battery, such as the CR2032 or CR2016, depending on the model of the remote. Check your remote’s user manual or remove the battery cover to verify the exact type of battery required for your specific remote model.
How to change the battery in a LiftMaster garage door opener remote?
To change the battery in a LiftMaster garage door opener remote, start by sliding open or unscrewing the battery compartment located on the back or side of the remote. Remove the old battery, taking note of the orientation of the positive and negative sides. Insert the new battery in the same orientation as the old one. Once the new battery is in place, close the compartment. Test the remote to ensure it is functioning with the new battery.
Do I have to reprogram my LiftMaster remote after changing the battery?
Normally, you do not need to reprogram your LiftMaster remote after changing the battery. The remote’s memory should retain the programming information even when the battery is removed. However, if the remote does not work after the battery change, you may need to re-sync it with the garage door opener by using the ‘Learn’ button on the opener.
How to reset LiftMaster remote?
To reset a LiftMaster remote, you will need to erase its programming from the garage door opener. Press and hold the ‘Learn’ button on the opener until the indicator light goes out, which usually takes about six seconds. This action deletes all remote controls from the opener’s memory. To reprogram the remote, press the ‘Learn’ button again briefly, and then press the button on your remote until the light blinks or you hear a click, indicating it has been successfully reprogrammed.
Why is my LiftMaster garage door opener not working properly?
If your LiftMaster garage door opener is not functioning correctly, several issues could be the cause. Common problems include misaligned or obstructed safety sensors, poor connection or power issues, and wear and tear on mechanical components such as springs and tracks. Check for any obstructions or misalignments first, and ensure the opener is receiving power. If basic troubleshooting does not solve the problem, the issue may be more complex, such as a malfunctioning circuit board or motor, which might require professional repair.
Conclusion
Replacing the LiftMaster garage door opener remote battery is a straightforward task that most homeowners can handle independently. Recognizing the signs of a dying battery and following the steps to replace it will keep your remote functioning effectively, ensuring easy access to your garage. Regular maintenance and proper care of your remote can extend its life and prevent future issues.
Family Prestige Garage Doors has been offering reliable, high-quality garage door services to homeowners in Alexandria and nearby. Need help replacing your LiftMaster garage door opener remote battery, repairs, or an upgrade? Our experienced team is ready to assist. We’re committed to providing exceptional service and ensuring your garage door system works perfectly. Contact us today and discover how we can elevate your garage door experience!
End Note
Family Prestige Garage Doors elevates your home’s security and exterior charm with customized garage door solutions. Our expert service and exceptional craftsmanship ensure your garage door functions optimally and enhances your property’s aesthetic. If you want to increase security, improve durability, or update your garage’s appearance, our professional team is ready to deliver the perfect solution tailored to your needs. Enhance your home with our trusted garage door services.
Understanding that each home has its character, we offer a variety of tailored options to suit your specific needs. Our services include everything from installation and routine maintenance to emergency garage door repairs, ensuring your door remains in peak condition.
Visit our About Us page to learn more about our mission and dedication to quality. Explore our comprehensive services, including High-Speed Door Maintenance, on our Garage Door Services page.
Are you wondering if we serve your location? Check our Service Area page to find out. We also provide flexible Financing options to help you get the garage door you want within your budget.
Browse our gallery for inspiration and a look at our craftsmanship. Visit our blog for tips and advice.
When you’re ready to connect, visit our Contact Us page. Experience the difference with Family Prestige Garage Doors—where quality and customer satisfaction are always our top priorities.


